BBIS Power Tools
BBIS Power Tools is a set of customizations that make it easier to manage BBIS from within Blackbaud CRM.
Category: Blackbaud CRM
BBIS Power Tools is intended to be easy to use and self-explanatory. This page covers the behaviors that may not be immediately apparent.
- After you purchase BBIS Power Tools, unzip the downloaded file. Inside, you’ll find two folders: bin and browser.
- Copy both folders into the bbappfx\vroot folder on your server. Or, if you’re hosted by Blackbaud, upload the zip file itself with the Blackbaud self-service deployment tool.
- Log into Blackbaud CRM and go to Administration > Application > Catalog Browser.
- Filter for a type of Package and an author of Nonprofit Complete, and load the BBIS Power Tools Package.
- Click Refresh Shell Navigation in the upper-left corner of the screen.
- To register the product, go to Administration > Nonprofit Complete > NPC License Keys, enter your license key, and click Save.
BBIS Power Tools is now fully installed.
Go to Web > BBIS User Management to see a list of all your BBIS users.
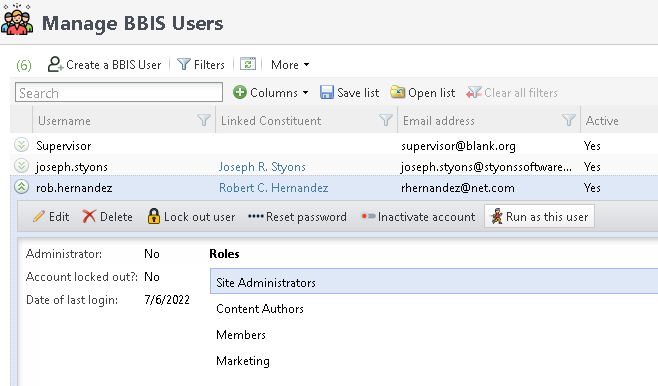
Clicking Run as this user opens a new tab, logged into BBIS as the user you selected. Any existing BBIS login in that browser is logged out in favor of the new user.
If you don’t see the button, or it isn’t working properly, see the run-as setup guide (PDF).
By default, only active users are shown. To include inactive or deleted users, click Filters and check their boxes.
The list of users is a listbuilder, so you can click any column header to filter on that column too.
Create User opens a dialog with several options. Most are self-explanatory, but a few are worth noting:
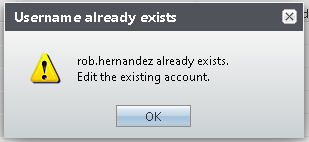
- User name: duplicate user names aren’t allowed. If the name is already in use, even by a deleted or inactive user, you’ll see a warning.
- Password: masked by default. Click show/hide to see it.
- Time zone: defaults to your local time zone if you’re in EST, CST, MST, PST, AKST, HST, London (GMT) or Hong Kong (HKT), and to EST otherwise. Choose whatever suits the user you’re creating.
- Constituent: link to any constituent, including organizations and groups. If you add a constituent from the lookup window, standard duplicate checking helps prevent duplicate constituents.
Deleting a user is a “soft delete”: it sets a deleted flag to true. The user record still exists in the database, and it can be undeleted if needed.
A user flagged as inactive can still log in. They’ll have limited functionality on your site, and their user record is tagged as inactive.
To block access to your site, use Lock out instead. A locked-out user sees a message like this one when they try to log in.

Go to Web > Email to see your BBIS emails. Filter by appeal, email name or date sent.
The statistics in the list are the same as those in the BBIS honeycomb report.

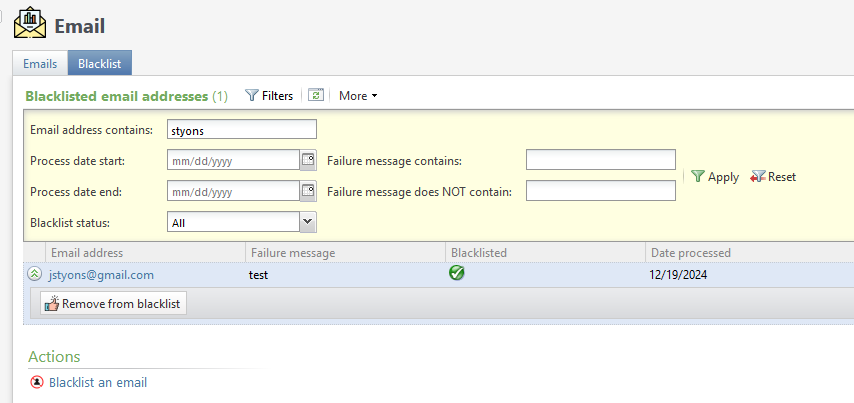
Go to Web > Email > Blacklist. Filter by email address, date, blacklist status or blacklist reason.
- To blacklist a new address, click Blacklist an email near the bottom of the page.
- To remove an address from the blacklist, click it and choose Remove from blacklist.
- To restore an address to the blacklist, click it and choose Blacklist this email.
Once an address has been blacklisted, it stays in the list. You can toggle its Is blacklisted flag, but not remove it entirely.
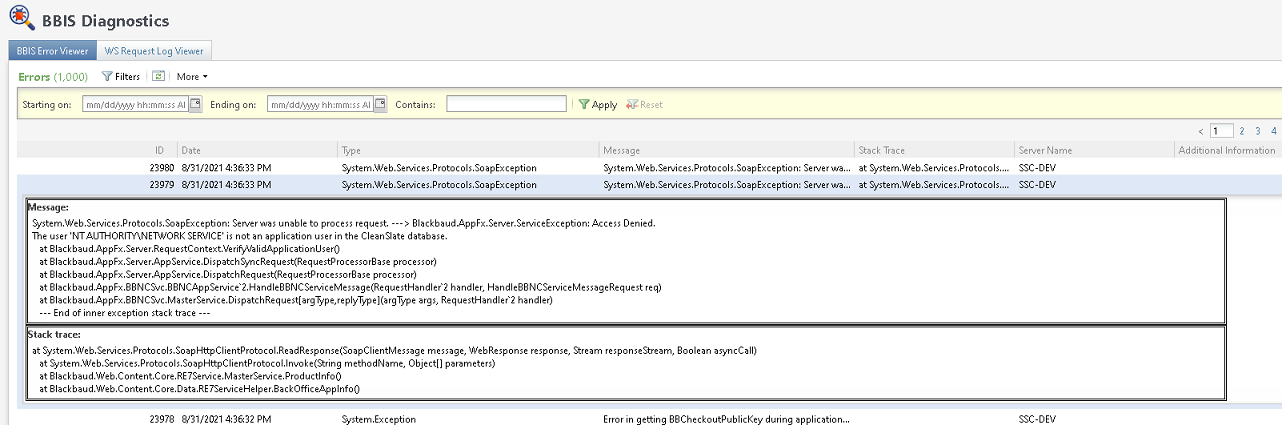
A view of the raw Error table in the database, which BBIS uses to record internal system messages. It also captures details of unhandled exceptions in custom parts.
Filter by date and error contents. The Contains filter looks for your text anywhere in any of the Message, Stack Trace and Additional Information columns.
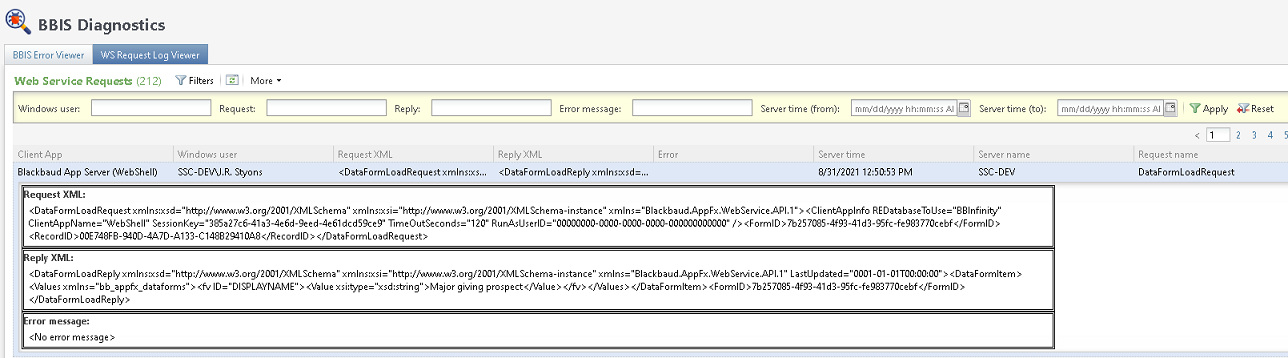
A window into the WSREQUESTLOG table, which captures extremely detailed information about requests to and responses from Blackbaud CRM endpoints, including CRM “talking to itself” during internal operations.
The log is off by default. To turn it on, open your web.config file, search for WSREQUESTLOG, and un-comment the logrequests key. The change takes effect immediately and affects performance, so don’t leave the log on in production for long.
Filter by Windows user, request, reply, error message and date. The text filters find your term anywhere in the filtered column.
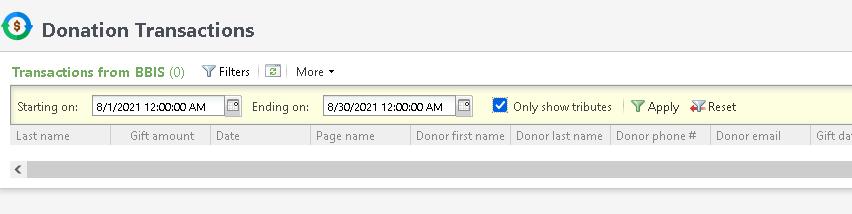
Go to Web > Donation Transactions. Filter by date, or show only tributes.
Last name, gift amount and date added come from their own fields on the DonationTransactions table. Every other field is extracted from the transaction’s XML data and flattened into an easy-to-read list.
If the XML contains special characters, such as accented names, it can’t be displayed at this time.
- March 2026: edit BBIS emails from within the edit form.
- December 2024: added blacklist management to the Email feature.
- June 2024: run as a BBIS user with a single click from within Blackbaud CRM.
- January 2024: new transaction viewer filters, including Only show tributes and XML contains.
- August 2021: a transaction viewer in CRM, to see transactions before they’re downloaded.
- January 2021: a new email dashboard, which surfaces the BBIS email honeycomb report in CRM.
- December 2020: a role filter on the BBIS User Management list; the constituent name is now a link, replacing the Go to Constituent button; column and action order on the user list optimized.